Chaining Digital Signals
Today, I’ll be going over how a signal can be altered using simple code in C++ and how make multiple transformations of the signal, also known as signal chaining, using that same code!
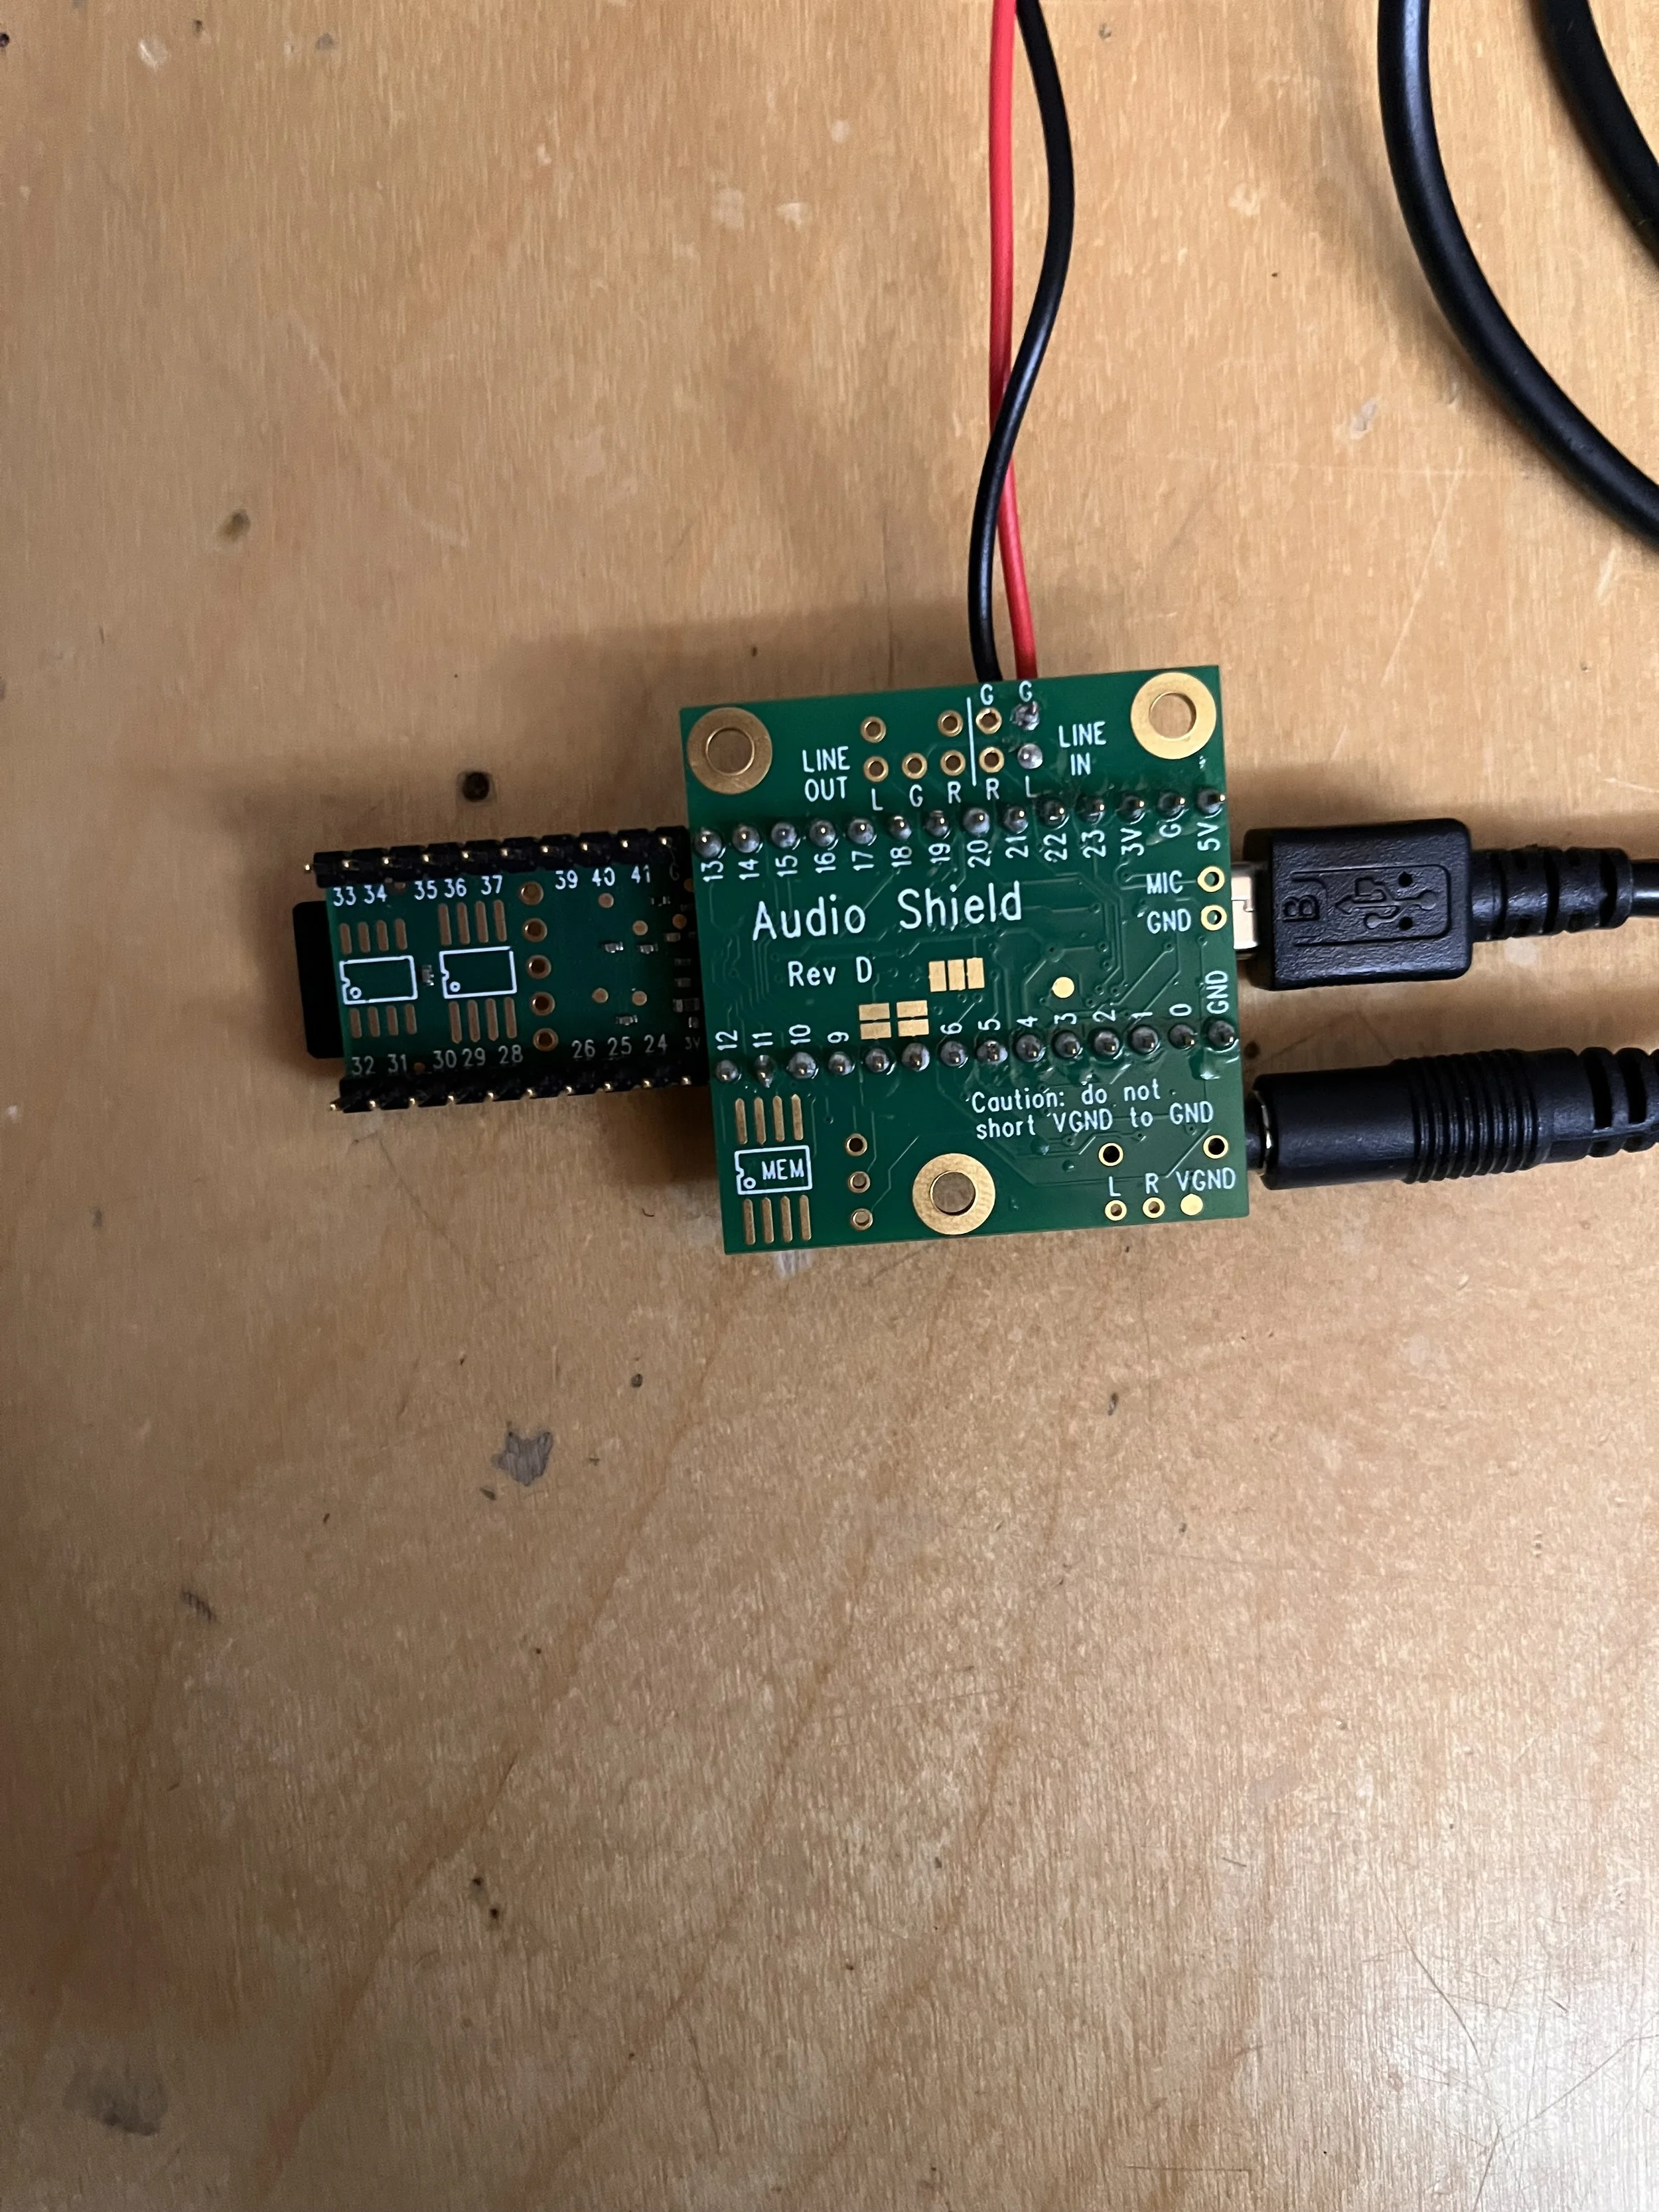
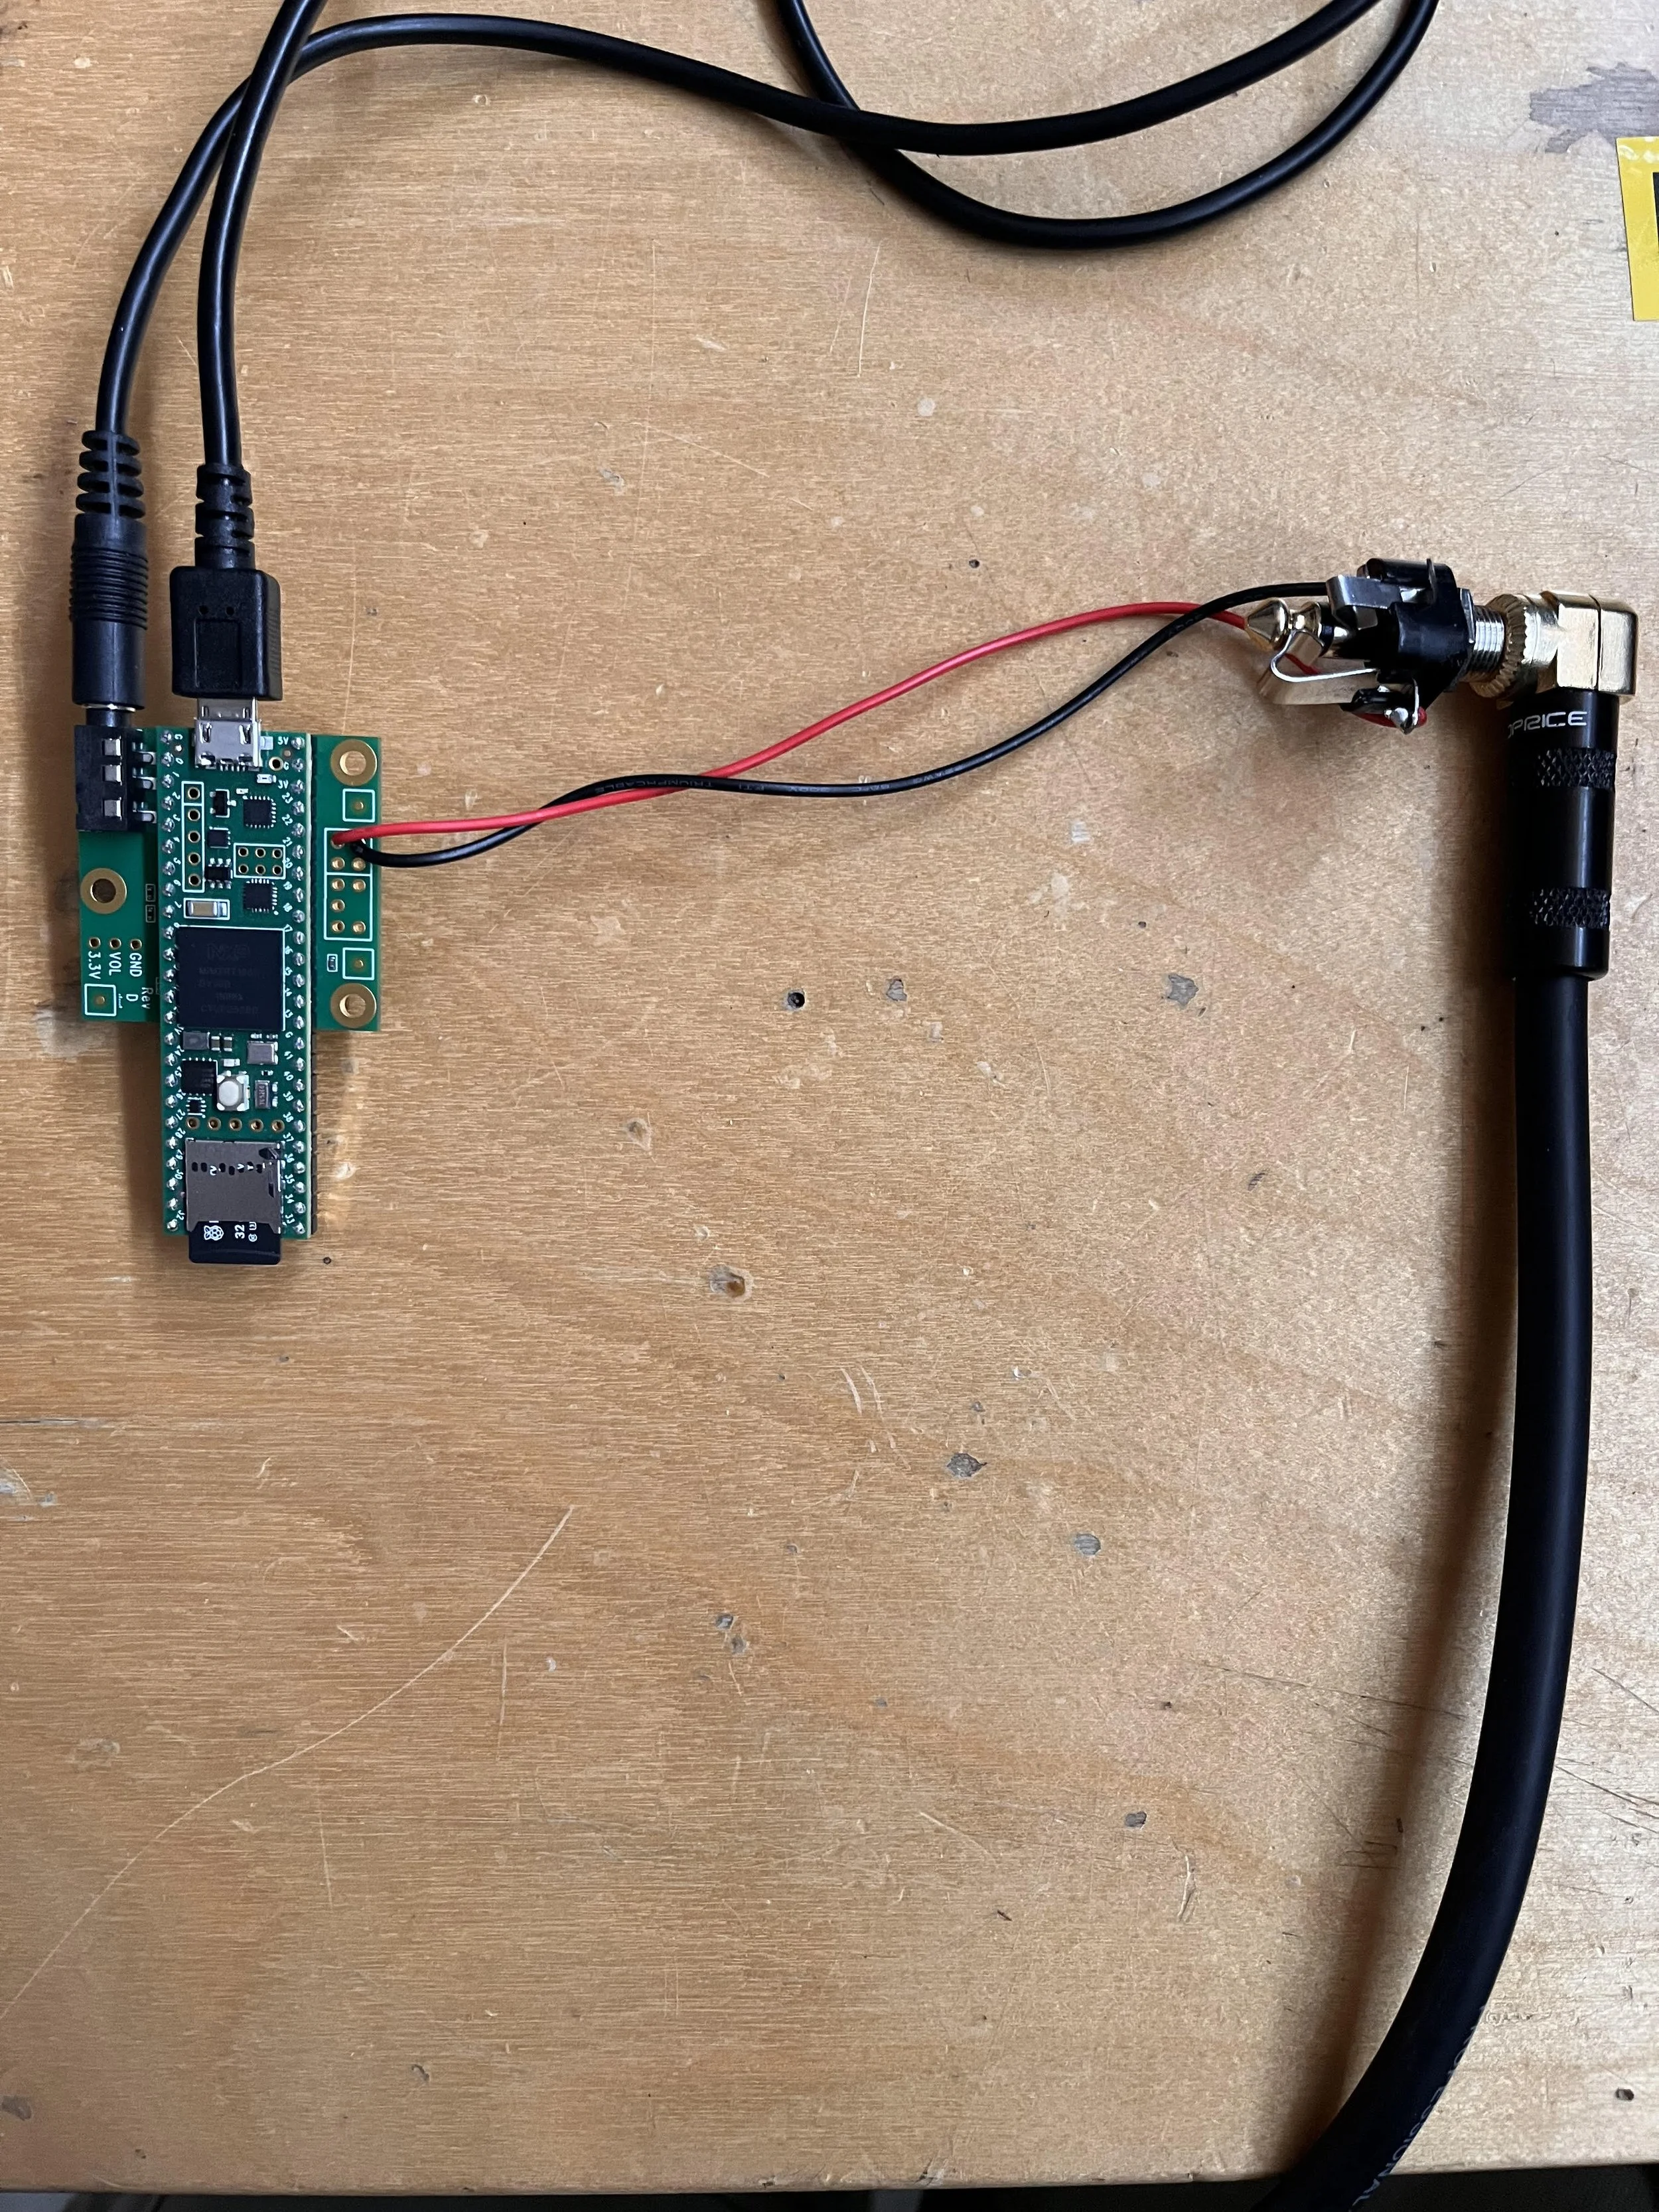
First things first though, you need your equipment! For this demonstration I’m using a Teensy 4.1 with an audio shield (Rev D), a simple 1/4’’ jack for your analog input, a micro SD card, and a 3.5mm male to male stereo cable, and of course a micro USB cable for power!
So, depending on your board there will be a different set of pins/code for audio interfacing, but if you simply wish to understand how it is supposed be done on a simple level, then I highly suggest following with what I’m going to explain!
Below you’ll find how I soldered the audio shield and 1/4 jack to the Teensy (very easy as the audio shield slides perfectly into the pins of the Teensy)!
Now that everything is wired and plugged in, let’s hop on over to Arduino IDE!
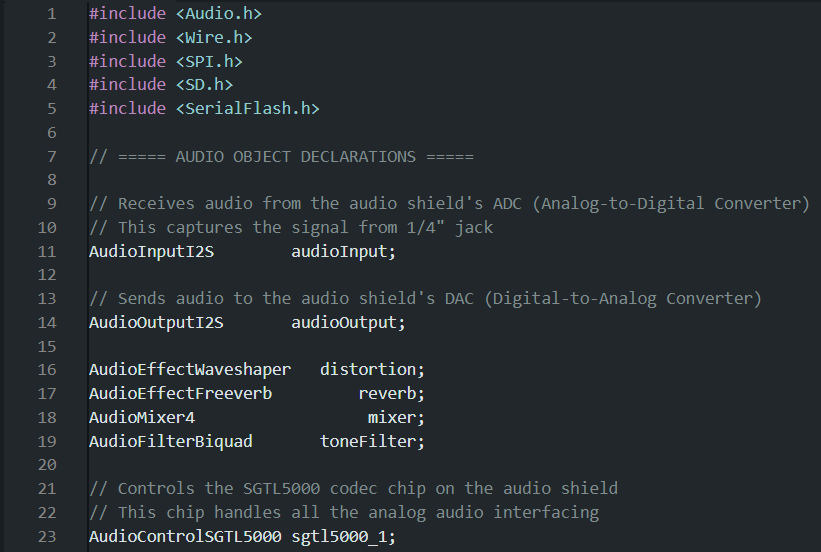
In here is where we’ll make a clean sketch and start creating our base for the program to run. I’ve including all of the necessary system functions and the audio object declarations with a little description of what they do. Just know that I2S is a communication protocol used for transmitting digital signals!
If you wish to view/copy the code, you can get it from my GitHub
(If you’re reading this then the GitHub is almost done!)
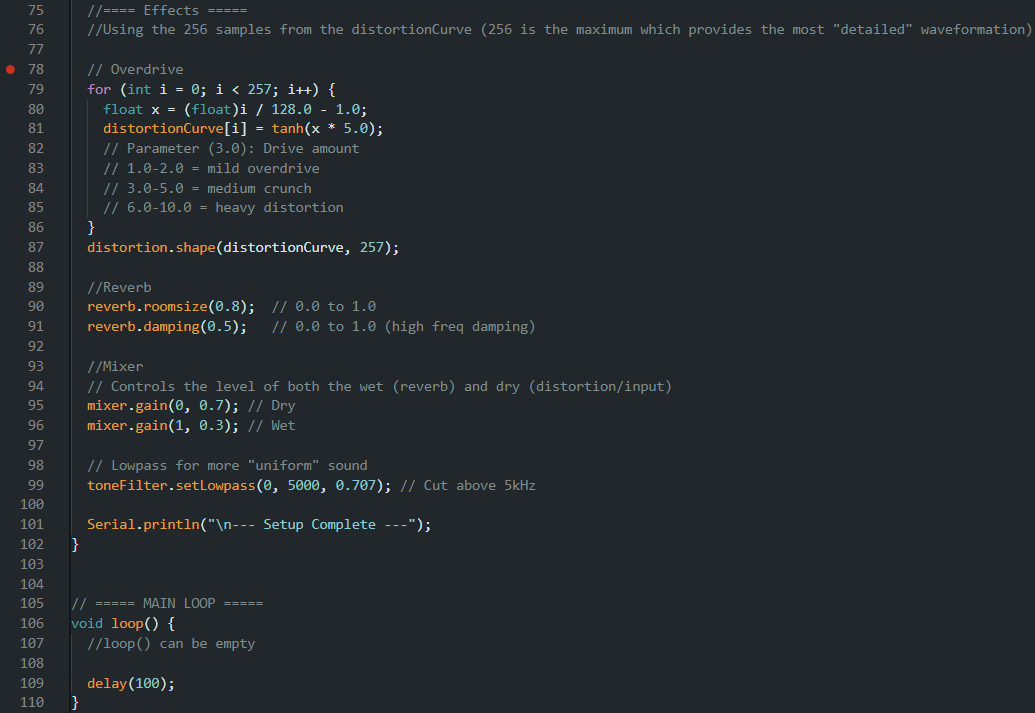
Now that we have our system code set up and out of the way, now it’s time to enable the audio shield and include all of the specific audio functions using the Teensy audio library! Once this is done, we will finally be able to add in the effects we initialized at the beginning.
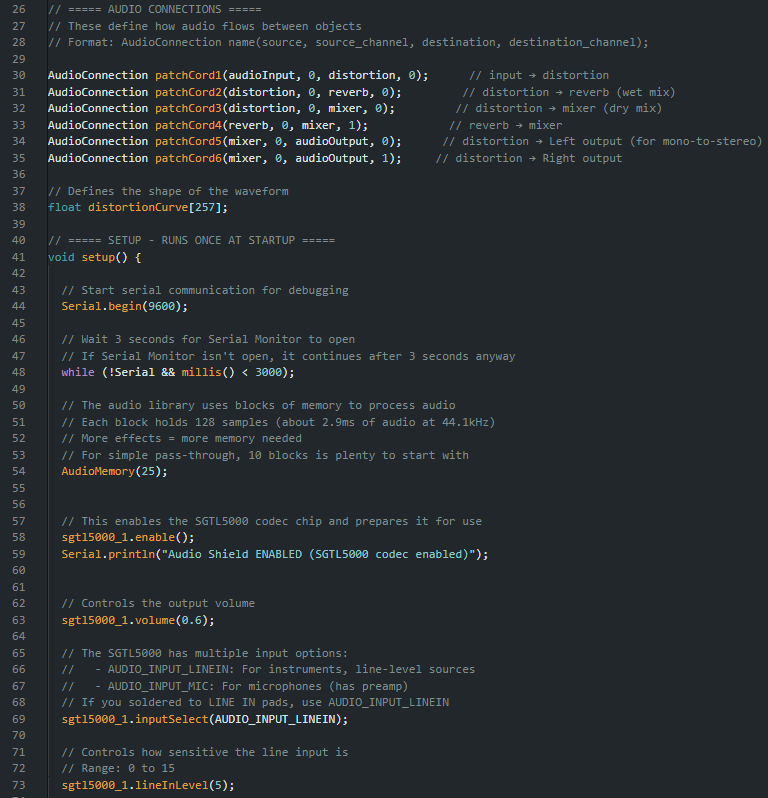
With this we have our clean analog signal going through our digital converter and then back out as an analog. Theoretically the code can stop hear and you’ll be able to get a simple and clean pass through… but that’s not why you’re here.
Here I provided a very simple 3-step signal chain that you can mess around with to get a good grasp of how it works.
That’s all there really is to it! Once you have this basic set up, you can really add and edit whatever you so please!
The GitHub for this will be updated regularly while I’m still working on my own project, so make sure to check it out every once in a while!
See you,
Raffy Landestoy
Computer Engineering 2028
04/21/26